How to create and sell NFTs
There’s been a lot of talk about the potential profit behind trading in NFTs but not a lot about how to actually create one for sale. Those curious can now learn how NFTs are minted on Rarible, one of the most user-friendly marketplaces.
No one could have expected that "monetized graphics" created in May 2014 would be worth over USD 40 billion by the end of 2021.
NFT's humble beginnings on Ethereum blockchain started with "Etheria" in October 2015 where most of the first 457 NFTs lay dormant with the hardcoded price of 1 ETH (USD 0.43 at the time of release). Etheria NFTs came into the public eye on March 13, 2021, when they became the focus of the buying frenzy and were sold for USD 1.4 million.
This blog will help you understand what NFTs are, how you can create them and put them on sale.
What are NFTs?
NFT or a non-fungible token is a non-interchangeable data unit stored on the blockchain. NFT is usually associated with photography, video, and audio files.
With the ability to track the files from their creation until the last transfer, NFTs can provide a public certificate of authenticity or proof of ownership. However, it is essential to note that the legal rights conveyed by an NFT can be in the "gray area". For example, if you upload content that you do not own the copyright to (e.g. "The Lord of the Rings"), you are technically breaking the law with that NFT. The rightful owner can sue you for infringement: even if it is "only" on a blockchain, that does not mean that the law does not apply.
Fair use in the case of using other people’s work is the reason why it could be considered a "gray area", but this blog will not focus on the legal aspect and copyright since that is a separate and complex subject.
What is minting?
To put it simply, minting is the process of creating NFTs.
NFT minting converts digital files into digital assets stored on the decentralized database or distributed ledger viewed on the blockchain. However, it is essential to know that the minting process is not free. First, you need to set up your NFT on a blockchain (most often Ethereum) which costs a gas fee. Besides gas fees, you will also have to pay sales fees on the NFT marketplace.
NFT marketplace fees can go up to 15 percent for the initial sale depending on the site on which you’re minting NFTs.
For those of you who are unfamiliar with it, a gas fee is an amount that you pay for every transaction (in this case, an NFT) executed on a blockchain. The gas fee is transferred to the miner who provides computing power and verifies your transactions, thus helping the blockchain continue to run.
The gas fee is not constant, mind you: it changes depending on the capacity. Fees go up when there is a high demand for the NFT transactions because there are restrictions on the amount of transaction gas used per (Ethereum) block. When the demand is high, miners will pick the higher fees, and if you did not offer enough, they will pick your transaction when it is profitable to process it.
The gas fee is measured in GWEI (1 billion GWEI = 1 ETH).
Additional information about the NFTs marketplace fees will be covered later in this blog.
Step by step guide on how to create an NFT
So, you decided to create an NFT on the Ethereum blockchain?
To start your journey into the world of NFTs, you will have to create an Ethereum wallet, purchase the ETH you’ll need for fees, and connect your wallet to the NFT marketplace.
Step 1: Create your Ethereum wallet
There are quite a few wallet options for the ETH wallets, but we'll go with MetaMask this time due to its convenience: as a wallet used by over a million crypto enthusiasts worldwide, it connects easily with most NFT marketplaces.
Furthermore, it can be used via a mobile app or a browser extension. If you need help installing it, you can check out their FAQ page.
Step 2: Buy a small amount of Ethereum
You will have to get some ETH to cover your minting process, gas fees, and marketplace fees. With MetaMask, you can buy it right from the wallet, but in case of most other wallets, you will have to purchase your ETH from the exchange and transfer it to your wallet.
Interestingly enough, most marketplaces (Rarible included) don’t actually use ETH for auctions but WETH (Wrapped ETH). What you need to do is "wrap" your ETH to get WETH - ETH and WETH are always exchanged at a 1:1 ratio but of course, you’ll have to pay a gas fee in this conversion process. How the process works is, before someone bids to an NFT, the marketplace has to pre-auth their WETH amount, and if (s)he wins, the marketplace will deduct that pre-auth WETH and transfer the NFT to him/her.
Step 3: Connect a wallet to the NFT marketplace
Now that you have your wallet and ETH in your wallet ready, you will have to choose the NFT marketplace and connect your wallet to it.
While there are a lot of NFT marketplaces, Rarible is perhaps the most user-friendly in terms of creating and adding NFTs.
To start using Rarible, you will have to connect your wallet to the site. To connect a wallet, go to the "Sign in" in the top right corner of the page.
Now, choose the wallet of your choice. For this example, we’ll use the already mentioned MetaMask but you also have Torus, Portis, Coinbase, Fortmatic - the list is updated periodically.
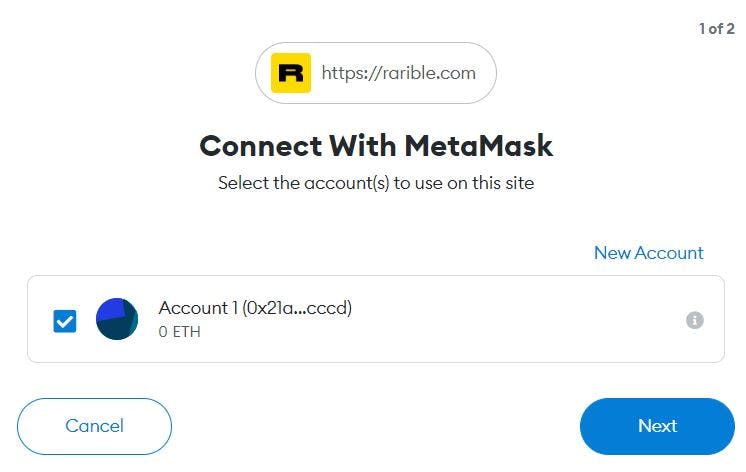
Connecting MetaMask
Once you click on the MetaMask wallet, a new window will open asking you to connect with it and allow Rarible to see address, account balance, activity, and suggest transactions to approve.
Once approved, your wallet will be connected to the Rarible, and you can start your journey and create your NFT.
Step 4: Start minting
To begin the process, click on the "Create" button in the top right corner after which you will be asked to choose a blockchain (Ethereum, Tezos or Flow) in order to continue.
Next, it’s time to choose whether you want to create a one of a kind NFT (“Single”) or offer it to more community members (“Multiple”).
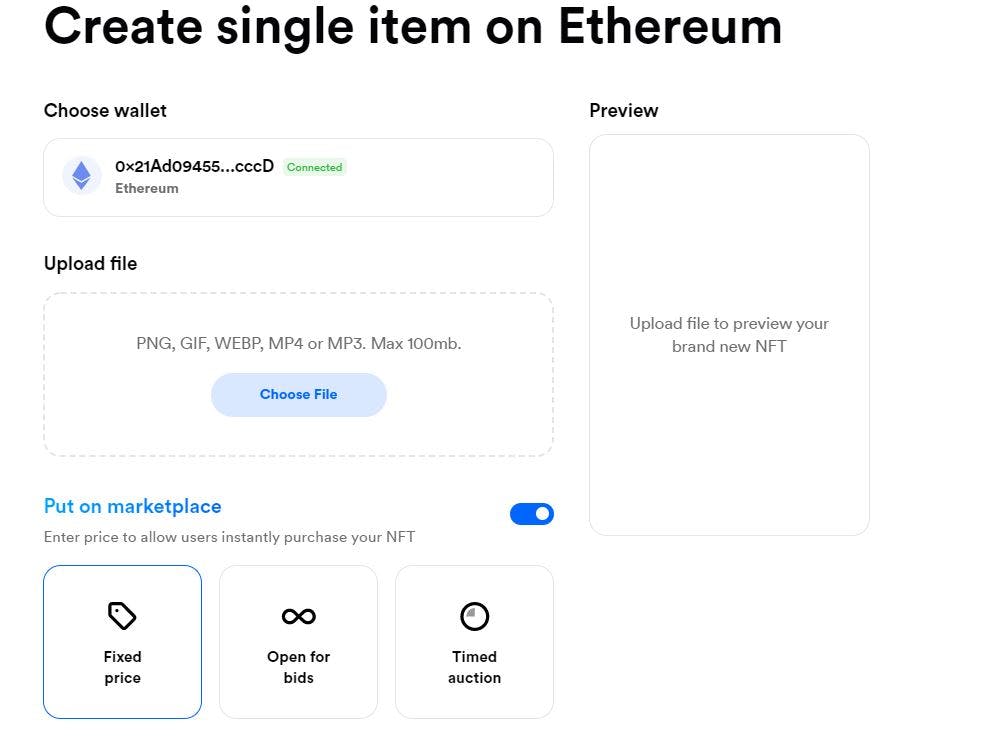
Initiating the minting process
To create an NFT, choose one supported file format (PNG, GIF, WEBP, MP4, or MP3) up to 100MB size, upload your image/video/gif and determine if you want to add it to the marketplace. In case you do not want to put your NFT on the marketplace right away, you can do it later on.
When it comes to the “value” of your NFT, you can:
- Set a fixed price - currently, there are 43 cryptocurrencies to choose from. There is also a fixed service fee on the Rarible of 2.5%
- Open it for bids - this means you are placing your NFT for biding without the minimal price and with infinitive duration
- Opt for a timed auction - this means you set a time period when buyers can place bids. You can select the minimum bid, choose the coin in which you want to receive your payment (Please note that ETH is not an option here, but you can use WETH in this case), and choose the start and end date. For fair usage and to avoid auction sniping, any bid placed in the last 10 minutes extends the auction duration by 10 minutes.
When you choose to sell your NFT, you also have the option to offer something additional to your buyers which they will unlock after they’ve purchased it. It can be something as simple as additional information (e.g. your NFT is a photo of some object and then as a special perk, the buyer can get the information about where that object is located) or an exclusive right to a new song from your favorite artist.
Bill Murray announced his series of 1000 NFTs, each with unique visual and accompanying text of a brief anecdote about him that he has either personally revealed or that can be verified from previously published material.
But, to get back to the morning: you can choose to create your NFT either on ERC-721 Multi Token Standard or in Rarible standard.
Also, you can choose the option "Free minting" which means that the buyer is the one who pays for the minting when (s)he purchases that NFT.
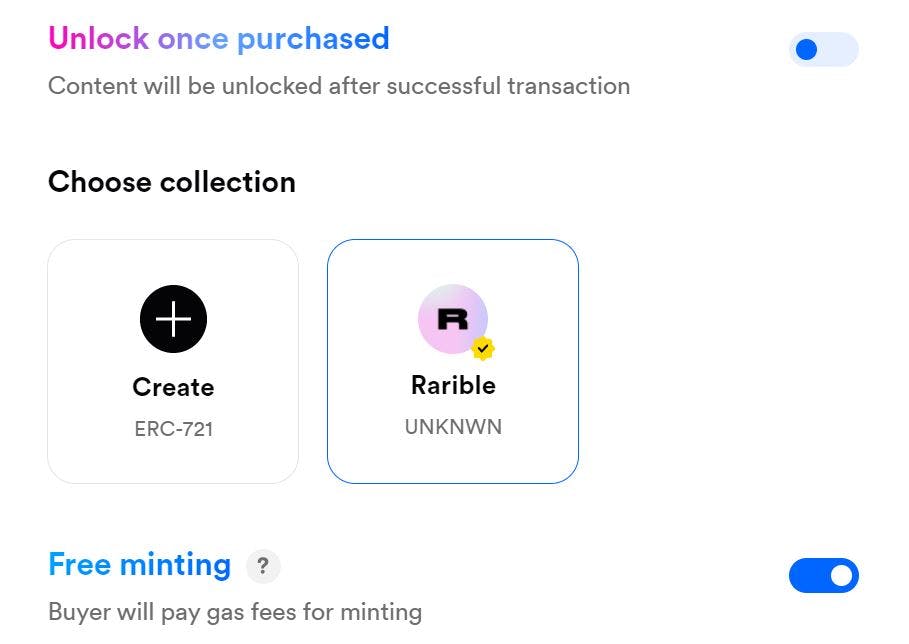
Additional settings related to minting
Once you are done with these settings, you’ll be able to name your NFT and describe it.
Lastly, you have to decide on the royalties that you will receive. Royalties are the amount you will receive from every future sale of your NFT and they can go up to 50%.
If you are interested, there are also advanced settings: under "Properties", you can add optional metadata, as well as an alternative text that can be used for voice over for people with impaired vision and other disabilities.
Once you have prepared, go to the "Create item".
Once minting process starts, you will receive two requests from your wallet that you will have to sign.
And that’s it!
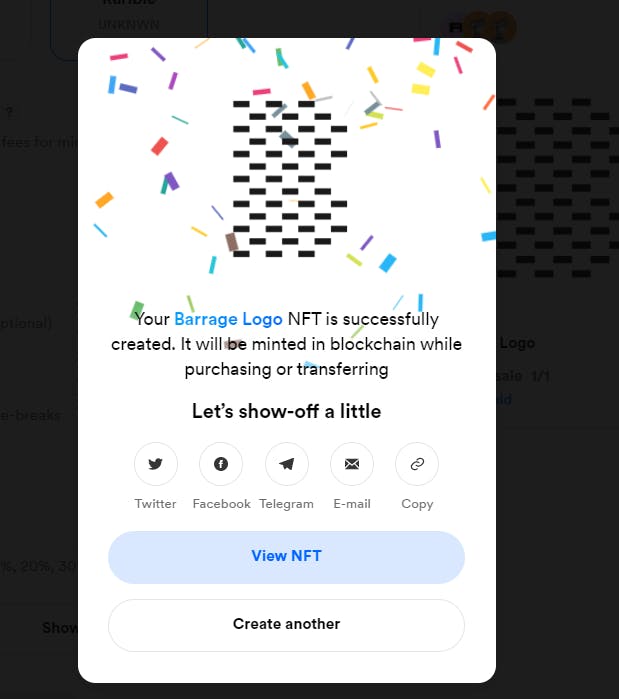
The NFT has been created
You have just created your first NFT. To attract buyers, you can share this info via Twitter, Facebook, Telegram, email, or directly via link.
Making changes to the created NFT
You can also view the NFT you have created and change the parameters as needed. In the top right corner, if you click on the three vertical dots menu, you can change the following parameters:
- Price - mind you, you can only lower the price in this manner. To increase the price, you should delete the created NFT and create a new one. If your NFT isn’t fetching any offers, it is also important to know that you can push the item you already offered for sale/auction to be more prominent on the marketplace by decreasing the price for more than 0.05 ETH.
- Remove from sale completely - this option allows you to remove your artwork from the sale, and re-list it after. This option is only available on Rarible platform, and if you offer the NFT you minted on Rarible for sale on other websites, you will have to manually cancel them there.
- Burn the NFT - you delete your NFT from blockchain by transferring it to a zero address.
- Transfer the ownership - you can transfer your NFT to another owner. Of course, you need to have enough funds in your wallet to cover the gas fee of the transaction.
- Refresh NFT’s metadata - this allows you to update on the latest information
- Share - as mentioned, you can share the info that you have an NFT for sale on Twitter, Facebook, Telegram, via email, or using a direct link.
Uses of NFTs now and in future
You have made your first steps into the world of NFTs.
But NFT is only starting, and there is no limit to this technology and application:
- From DeFi technology, you can use your NFT as collateral that you get back once you pay your debt, or if you do not pay, thanks to the smart contracts, the lender receives the NFT.
- NFTs can be used at events as tickets that can not get wet and ruined, and ruin your night out.
- With the Ethereum Name Services, you can already create your unique username for Web 3.0. You can attach your wallets and decentralized websites to your unique name or username.
- NFTs can also be used as proof of ownership of a mining node. That concept is used by XST (Stealth), and you can find out more about it here.
- NFT can be a solution to 3D printing copyrights. Currently, STL, 3MF, or any other 3D formats are publicly exposed during use, and thus the creator loses effective control over the property. NFTs could solve this issue using blockchain as proof of ownership, as you can relatively easily store the URL of the original file. At the moment, it is not practical to put the file on the blockchain due to their size.
Your take on the subject
They say knowledge has power only if you pass it on - we hope our blog post gave you valuable insight.
If you want to share your opinion or learn more about minting NFTs, and related topics such as cryptocurrency, smart contracts and blockchain, feel free to contact us. We'd love to hear what you have to say!